
Omnisend Post Purchase Flow
Omnisend Post Purchase Flow — set up a 5-touch sequence that increases repeat purchases and lifts AOV with smart cross-sells, review requests, and a clean “done” checklist. Keep this tab open while you build inside Omnisend.
Building the full system? See customer journey automation.
Omnisend Post Purchase Flow template (timing + intent)
This flow is built for measurement. You’re not “sending more emails” — you’re creating a repeat-purchase system with clear intent at each step.
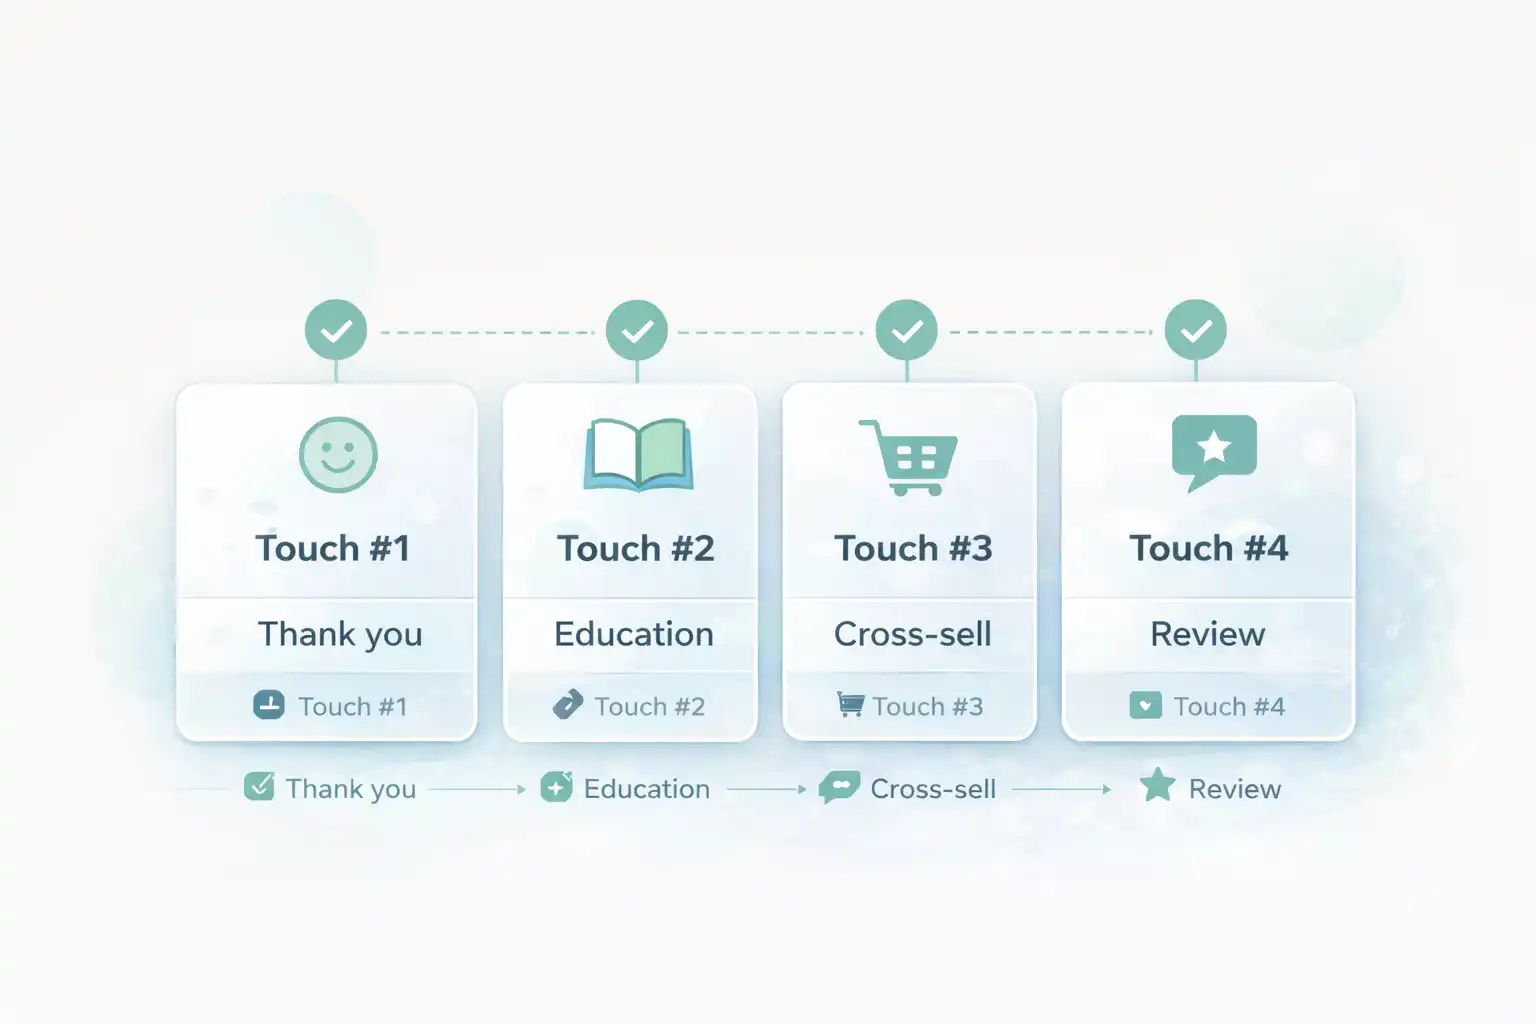
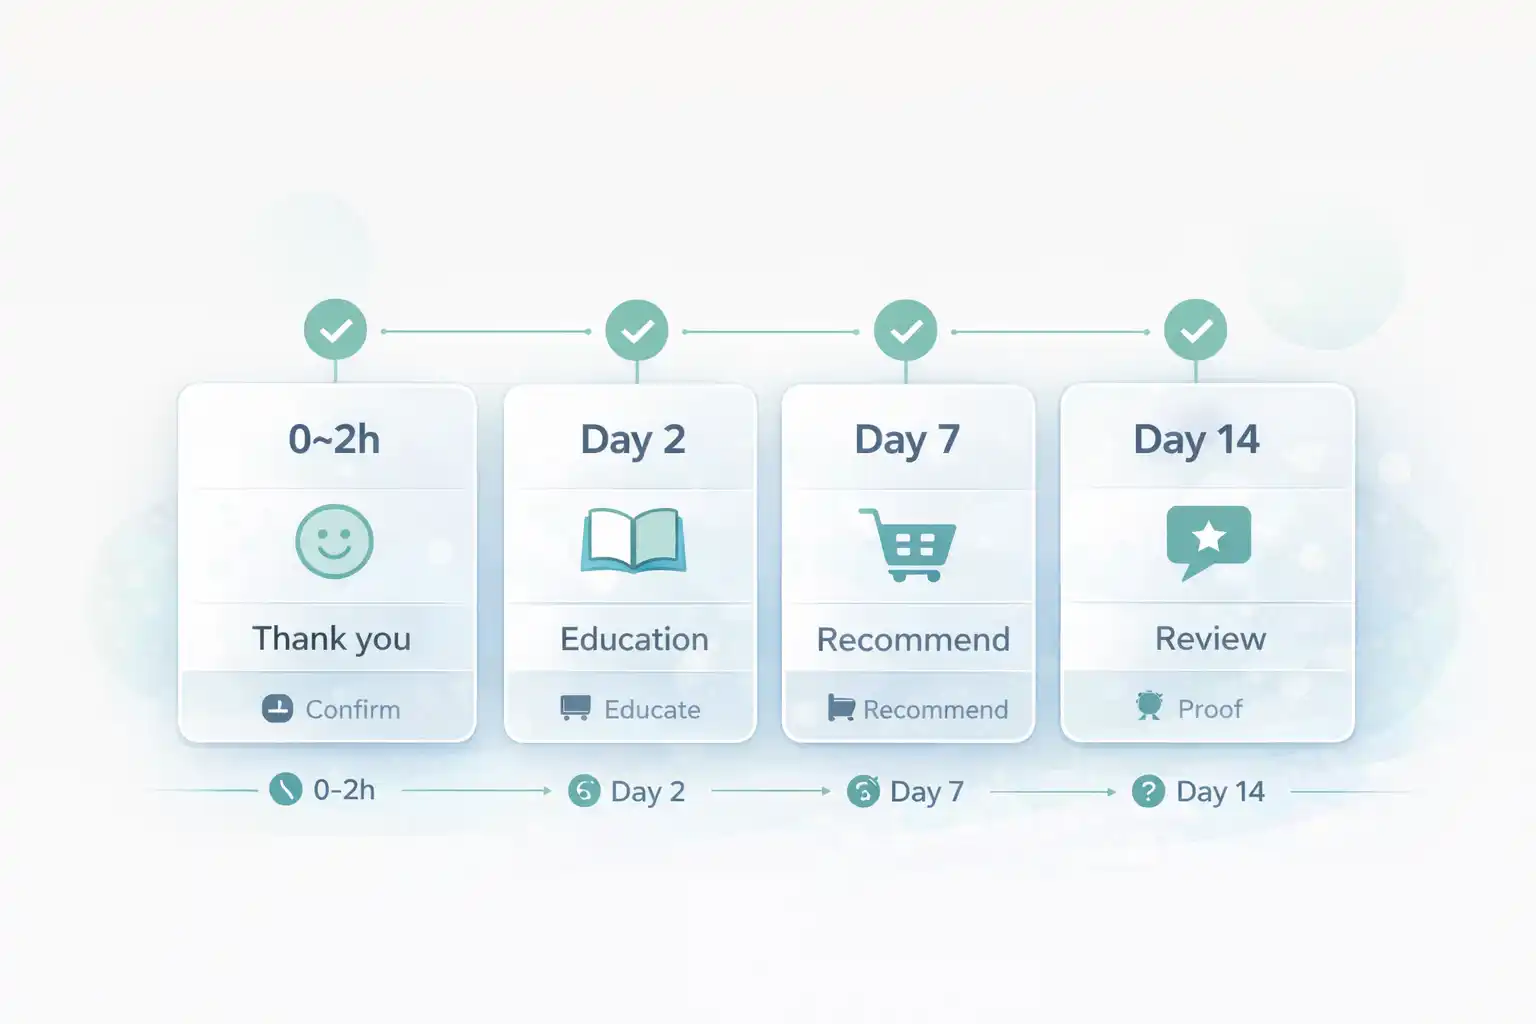
- Touch #1 (0–2 hours): “Thanks + what happens next” (reduce anxiety, set expectations).
- Touch #2 (Day 2): “How to use / care tips” (reduce returns, increase satisfaction).
- Touch #3 (Day 7): “Smart cross-sell” (accessories, refills, bundles).
- Touch #4 (Day 14): “Review request” (social proof engine).
- Touch #5 (Day 30): “Winback / replenishment” (repeat purchase).
Before you start Omnisend Post Purchase Flow
Prep these 6 items so you don’t get stuck mid-build:
- Your store sends transactional order confirmations normally (keep those as-is).
- In Omnisend you can segment customers by purchased product/category.
- Choose 1–2 cross-sell sets (accessories / refills / upgrades).
- Collect your support link, shipping page, and returns page URLs.
- Have 1 real test inbox (Gmail recommended).
- Decide exclusions: refunded/cancelled orders and wholesale/VIP (if relevant).
Ready? Open Omnisend and create a new automation workflow.
Open OmnisendCommon mistakes (that waste hours)
- Cross-selling too early → first reduce anxiety + help them succeed with the product.
- No exclusions → refunded/cancelled customers still get upsell emails.
- Generic recommendations → “you may also like” without rules performs worse than a tight accessory set.
- Multiple CTAs → one clear CTA per email increases completion.
- Never testing links → you lose revenue on broken product URLs.
Omnisend Post Purchase Flow Step-by-step: build the flow
Step 1/8 — Choose the trigger: “Order placed”
Goal: correct entryYour post-purchase flow should start only after a successful purchase. Use the order-based trigger (not “signup”).
Do this
- Create a new workflow in Omnisend.
- Select the trigger: Order placed (or the equivalent purchase event).
- Name it clearly (e.g., “Post-Purchase v1”).
FOLLOW reference (official)
Omnisend workflow docs (helpful when you check trigger options): Omnisend Help Center
Use official docs to confirm event names and conditions for your store integration.
Step 2/8 — Add guardrails (exclusions + split)
Goal: relevanceGuardrails prevent awkward emails (refunds, cancelled orders) and help you personalize cross-sells by category.
Minimum exclusions
- Exclude: cancelled and refunded orders.
- Exclude: customers who made multiple purchases in the last 7 days (optional, prevents spam).
- If applicable: exclude wholesale/VIP segment.
Copy/paste rule notes
Exclude orders with status: cancelled, refunded
Optional: exclude customers with 2+ orders in last 7 days
Optional: split by product category to improve cross-sell relevance
Step 3/8 — Touch #1 (0–2 hours): “Thanks + what happens next”
Goal: reduce anxietyThis is not a receipt replacement. It’s a reassuring message that reduces support tickets and primes the next steps.
Subject lines (copy)
Thank you — your order is in motion
Quick update: what happens next
Minimum content
- One sentence: thank you + confirmation
- Shipping expectation (simple)
- Support link (one click)
- One CTA: “Track order / View order” (if available)
Building in Omnisend right now? Keep going — the next touch is where AOV lift starts.
Start Omnisend FreeStep 4/8 — Touch #2 (Day 2): “How to use / care tips”
Goal: successThis email increases satisfaction and lowers returns. It’s also the best place to introduce a complementary add-on softly.
Copy/paste skeleton
Headline: Make the most of your purchase
Bullets:
• Tip #1 (30 sec)
• Tip #2 (mistake to avoid)
• Tip #3 (best practice)
Optional: one accessory recommendation (single product)
CTA: See tips / Get the guide
Success check
- Easy to scan on mobile
- One CTA only
- Any product links open correctly
Step 5/8 — Touch #3 (Day 7): “Smart cross-sell”
Goal: AOV liftThis is your money email. The trick is relevance: recommend 2–4 items that logically complete the purchase.
Cross-sell rules (copy)
Rule: Recommend accessories/refills that match purchased category
Show: 2–4 items max (best sellers)
Avoid: full catalog links
CTA: Complete your setup
Subject lines (copy)
Complete your setup (recommended add-ons)
Most customers add these next
Step 6/8 — Touch #4 (Day 14): review request
Goal: proofReviews increase conversion for future buyers and improve ad performance. Keep the ask simple and gratitude-based.
Copy/paste skeleton
Headline: How did it go?
Line: Your feedback helps other customers choose with confidence.
CTA: Leave a review
Optional: 1 bullet on what to mention (fit, quality, shipping)
Guardrails
- Exclude refunded/cancelled orders
- Use one CTA
- Make review link direct (no hunting)
Step 7/8 — Touch #5 (Day 30): winback / replenishment
Goal: repeatThis touch pulls forward the second purchase. Use “restock” language for consumables or “next step” language for durable goods.
Two copy options (pick 1)
Option A (consumables): Time for a restock?
CTA: Restock now
Option B (durable): Your next step (recommended upgrades)
CTA: Shop recommended
When to add an incentive
- If second purchase rate is low
- If you have margin room
- Use only here (don’t train early discounts)
Step 8/8 — Test, publish, and monitor for 7 days
Goal: prove itDo one clean test order, verify emails arrive in a real inbox, and confirm every CTA lands on the right page.
Testing checklist
- Place a test order (real email)
- Temporarily shorten delays if needed
- Check mobile formatting for each email
- Confirm links are correct (products, review, support)
What to track (first 7 days)
- Revenue per email (Touch #3 is key)
- Clicks on cross-sell products
- Unsubscribes (too frequent or too generic)
- Review completion rate
Omnisend Post Purchase Flow Flow diagram (timing + intent)
Visual reference for your 5-touch schedule so the sequence stays consistent.
Omnisend Post Purchase Flow Done checklist (you’re finished when…)
- The workflow trigger is “Order placed” and you tested a real order.
- Refunded/cancelled orders are excluded.
- Touch #1 reduces anxiety (support + expectations).
- Touch #2 provides help tips (lower returns).
- Touch #3 cross-sells with relevance (2–4 items max).
- Touch #4 requests a review with a direct link.
- Touch #5 drives the second purchase (winback/restock).
- The workflow is ON (not draft) and inbox tests succeeded.
- You’ll optimize after 7 days (one variable at a time).
Publish your post-purchase system today
You now have a clean 5-touch sequence designed to lift repeat purchases and AOV. Open Omnisend, publish v1, then optimize with 7 days of real data.
No credit card required • Cancel anytime • Publish first, optimize later