
omnisend shopify setup — keep this open in one tab while you work inside Shopify + Omnisend in another.
Omnisend Shopify Setup Step-by-Step
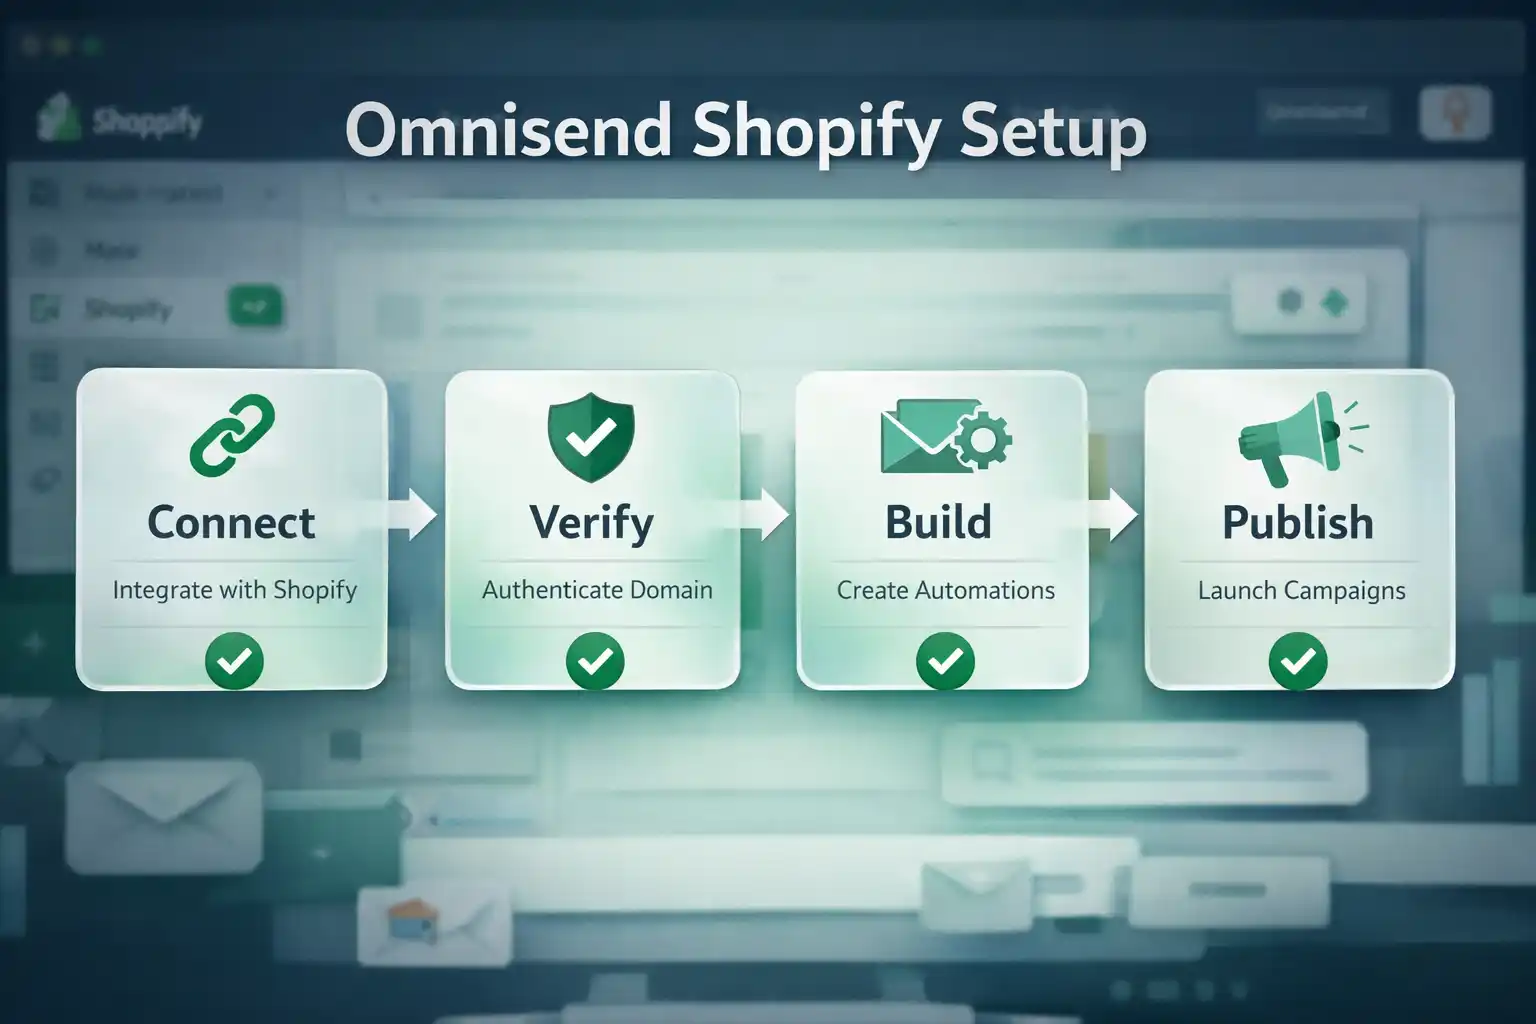
This omnisend shopify setup playbook connects your store, verifies your sender, confirms events are firing, and publishes two revenue flows (Welcome + Abandoned Cart) without guessing what to click.
No credit card required • Cancel anytime • Ship v1 today, optimize after 7 days of data
omnisend shopify setup: before you start
The goal of this omnisend shopify setup is not “perfect marketing” — it’s removing friction so you can ship. You’ll finish today with tracking working and at least one automation live.
- Shopify Admin access (permission to install apps).
- Sender email you want to send from (ideally on your domain).
- Domain/DNS access (only if you verify a domain).
- A test inbox (Gmail/Outlook) to confirm delivery.
- A test product so you can add-to-cart / start checkout quickly.
Common mistakes (that waste hours)
- Installing the app with the wrong Shopify user (missing permissions → tracking issues).
- Skipping sender verification and wondering why emails “disappear”.
- Building flows before checking events (no events = no sends).
- Overbuilding on day 1 (10 flows, 0 data). Ship v1, optimize after 7 days.
- Consent mismatch (importing contacts without clear permission).
Step-by-step
Start your Omnisend account (clean workspace)
This keeps your omnisend shopify setup clean and easy to troubleshoot.
- Open Omnisend and create an account with your business email.
- Select platform: Shopify.
Install Omnisend from the Shopify App Store
This is what enables product/customer/event sync.
- In Shopify Admin: Apps → Shopify App Store.
- Search Omnisend, click Install, then approve permissions.
Reference (FOLLOW): Shopify guide for installing apps: Installing apps
Confirm the Shopify ↔ Omnisend connection
We verify sync before we build anything.
- In Omnisend, confirm your store name is correct.
- Wait for initial sync (products/contacts can take a bit).
Set your sender + verify it (deliverability foundation)
Verified sender is the fastest “trust win” in any omnisend shopify setup.
- Open Omnisend: Sender / Email settings.
- Add your sender email (prefer your domain).
- Complete verification (email or domain verification).
Confirm events are firing (before flows)
If events don’t fire, automations won’t send — even if they look “published.”
- Open Omnisend events/activity area.
- Run a quick test: view a product → add to cart → start checkout.
- Refresh Omnisend and confirm you see activity.
Set consent rules (especially if importing)
Clean consent keeps your list healthy and your business safe.
- If you import contacts, import only people with marketing permission.
- Verify subscribed vs unsubscribed mapping.
- Keep v1 simple: capture consent via forms going forward.
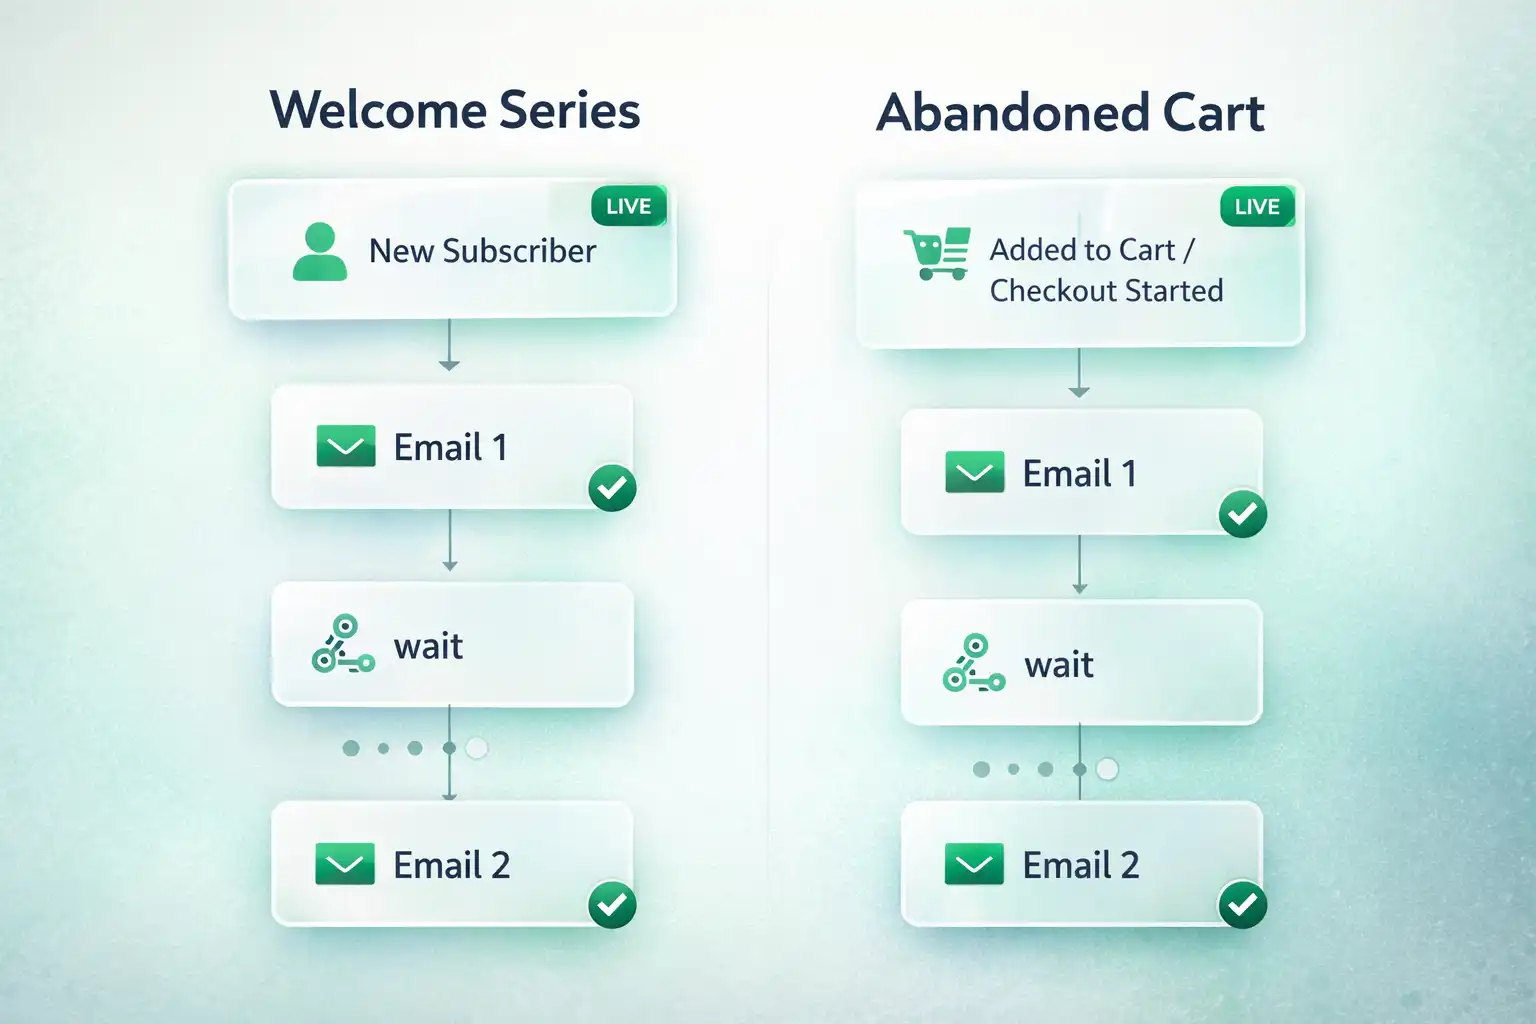
Build v1 flows: Welcome + Abandoned Cart
These two deliver fastest ROI for Shopify email automation.
- Create a Welcome automation (trigger: new subscriber).
- Create an Abandoned Cart automation (trigger: added to cart / checkout started).
- Keep v1: 1–2 emails each. Publish. Iterate later.
Add a signup form (so it starts compounding)
No list growth = no compounding. Give your welcome flow a steady stream.
- Create a simple form (minimal fields).
- Connect it to the Welcome flow trigger.
- Place it: footer + key pages.
Run an end-to-end test and publish
This is how your omnisend shopify setup becomes “done”, not “almost”.
- Subscribe with a test email → confirm Welcome email arrives.
- Trigger cart/checkout → confirm Abandoned Cart is eligible to send.
- Check links + unsubscribe/footer compliance.
Done checklist
If you can tick these, your omnisend shopify setup is complete:
- ✅ Omnisend app installed in Shopify
- ✅ Store connected and synced
- ✅ Sender verified
- ✅ Events firing (view/cart/checkout)
- ✅ Welcome flow Live
- ✅ Abandoned Cart flow Live
- ✅ Test email received in a real inbox
- ✅ Links + unsubscribe/footer look correct
Next: if you want the broader strategy (segmentation, timing, benchmarks), see Shopify Email Automation. For limits/features, see Omnisend Pricing 2026.
Ready to publish? Open Omnisend and go Live.
You’ve removed the friction. Now it’s execution. Start free, publish v1, and optimize after 7 days of data.
Start Omnisend Free (Shopify)